Table of Contents
Managing Venues
How to create and manage venues and their locations for your team
Managing Venues
Venues are saved location records for the sites your team regularly operates at. Set one up once, and it's available to select every time you create an event there — no re-entering postcodes and coordinates each time.
Overview
A venue is a named, geolocated site — a motorsport circuit, a festival field, a sports stadium — that belongs to your team. Within each venue you can define multiple locations: specific points within the site, such as medical posts, spectator areas, or circuit sectors. These locations appear as pins on an interactive map and are available for reference when your team is operating on-site.
When an event is linked to a venue, you don't need to enter a location separately during event setup — the venue's details carry across automatically.
Before You Start
- You must be a team owner or have the admin role on your current team. Read-only members cannot create or edit venues.
- Venue management requires an active subscription. The Venues option will only appear in the sidebar if your team's subscription is active. If you don't see it, check your team's subscription.
- Make sure you have the GPS coordinates or address details for the venue to hand — the location picker can search by address, postcode, or what3words address, so you don't need to know the exact latitude and longitude upfront.
-
In the left-hand navigation sidebar, expand the Resources section.
-
Click Venues.
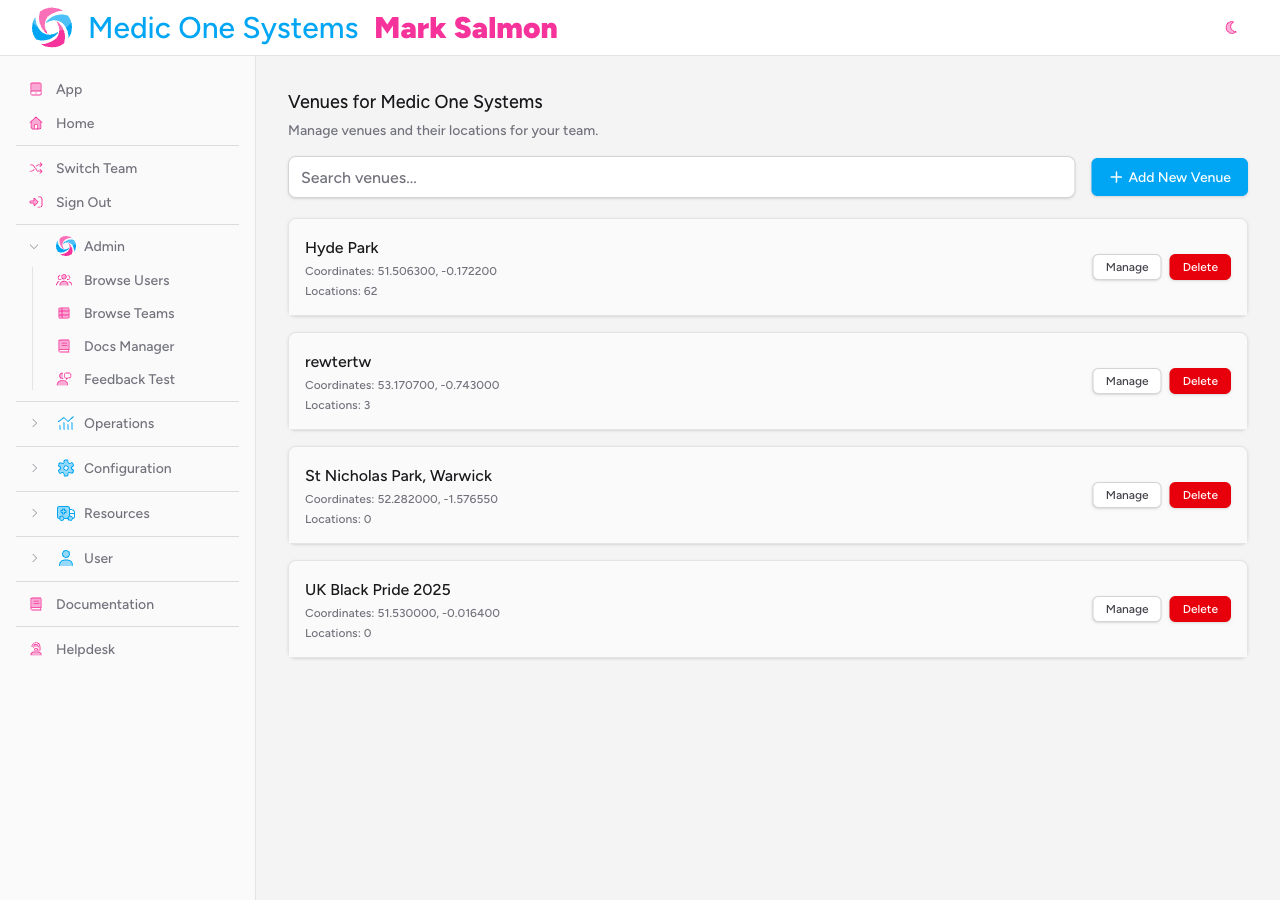
You'll land on the Venues index page, which lists all venues your team has created, in alphabetical order. Each venue card shows its name, GPS coordinates, and the number of locations it contains.

If your team has no venues yet, you'll see an empty state with an Add New Venue button in the centre of the page.
Creating a Venue
Step 1: Start a New Venue
From the Venues index page, click Add New Venue in the top-right corner.

You'll be taken to the Create New Venue page.
Step 2: Enter the Venue Name
In the Venue Name field, type the name of the venue.
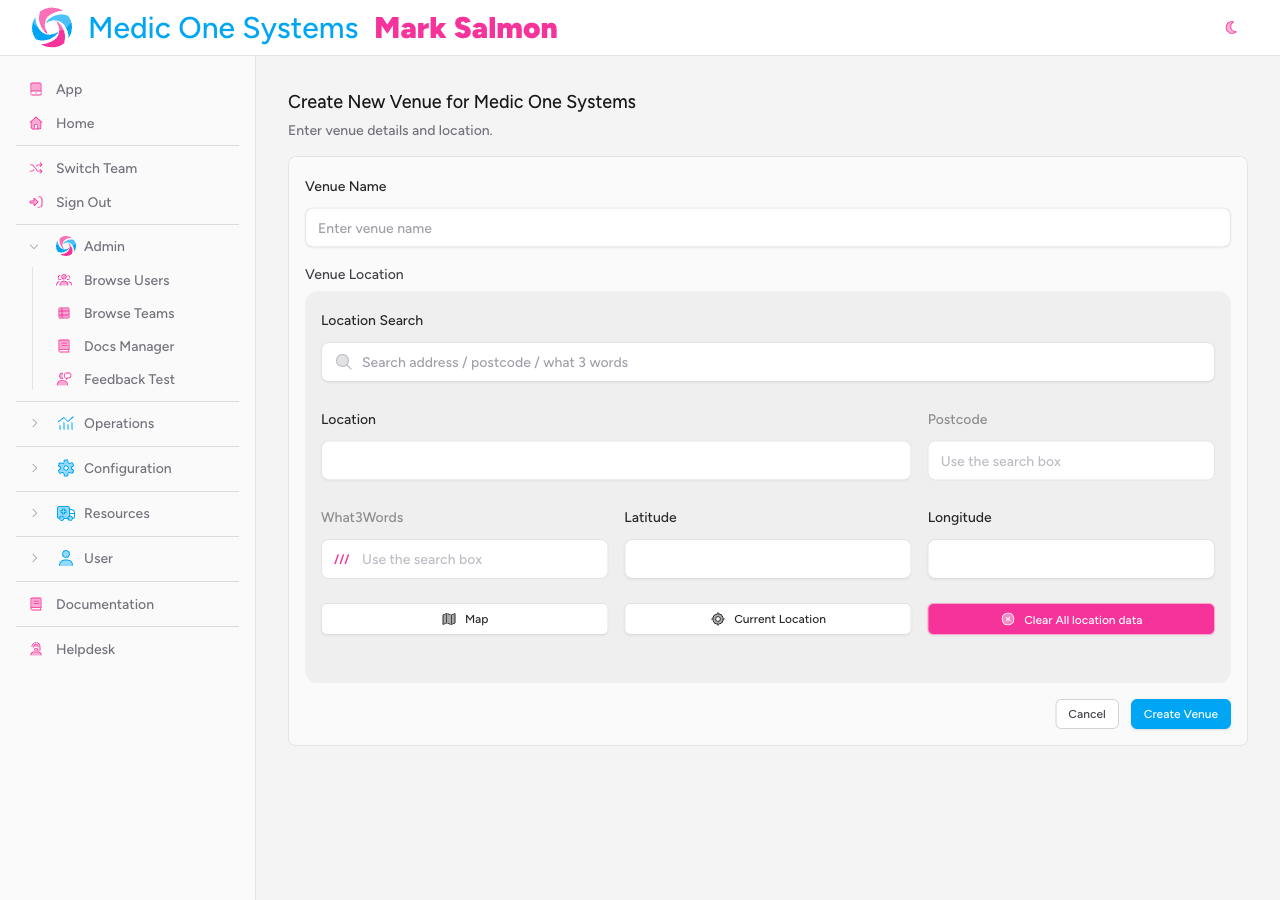
The name must be between 2 and 64 characters. Choose something descriptive and consistent — this is what your team will see when selecting a venue during event setup.
Step 3: Set the Venue Location
Below the name field is the Venue Location panel. This is a location picker with several ways to pin the venue on the map.
Using the search box (recommended):
Type an address, postcode, or what3words address into the Location Search field. Suggestions appear as you type — select one to automatically populate the Location, Postcode, What3Words, Latitude, and Longitude fields.
The search box handles addresses, postcodes, and what3words addresses (e.g.,
///filled.count.soap). If your query contains two dots, IndieBase will switch to what3words suggestions automatically.
Using the map:
Click the Map button to open an interactive map. Click anywhere on the map to place a pin — a small pop-up will confirm the coordinates and offer a Set Location button. Click Set Location to confirm the pin and populate the coordinate fields.
Using your device's GPS:
Click Current Location to pin the venue to where you are right now. This is handy if you're physically on-site during setup.
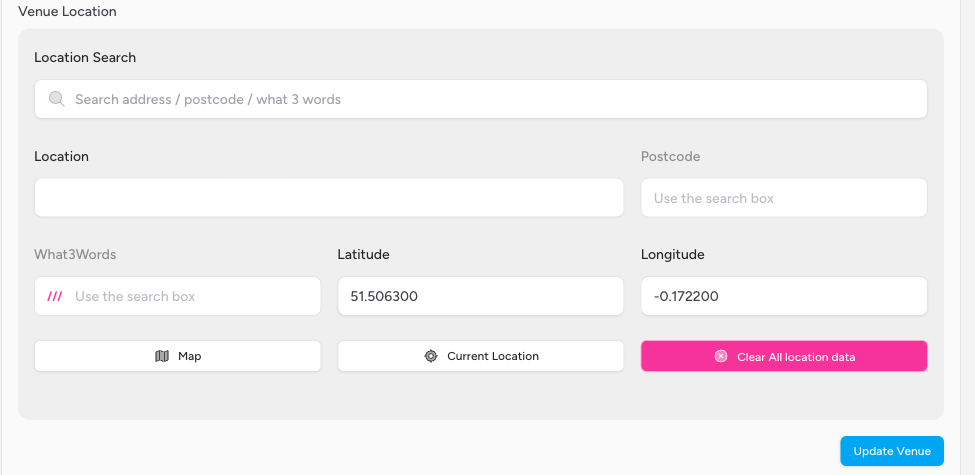
Entering coordinates manually:
If you know the exact GPS coordinates, type them directly into the Latitude and Longitude fields. IndieBase will look up the address and what3words for you.
The fields explained:
| Field | What it's for | Required? |
|---|---|---|
| Location Search | Search address, postcode, or what3words | — |
| Location | Human-readable address or place name | Yes (auto-filled via search) |
| Postcode | Postal code for the venue | No (auto-filled via search) |
| What3Words | what3words address for the venue | No (auto-filled via search) |
| Latitude | GPS latitude, up to 6 decimal places | Yes |
| Longitude | GPS longitude, up to 6 decimal places | Yes |
Postcode and What3Words are read-only — they're populated automatically via the search box. Use the search box if you need to change them.
Click Clear All location data to wipe all location fields and start again.
Step 4: Save the Venue
Once you've filled in the Venue Name and set a location (so that Latitude and Longitude are populated), click Create Venue.

IndieBase will save the venue and immediately take you to the Manage Venue page, where you can add specific locations within the venue. A "Venue created successfully!" notification will confirm the save.
If you change your mind, click Cancel to return to the Venues index without saving.
Editing a Venue
To update an existing venue's name or location:
-
From the Venues index, click Manage on the venue card you want to edit.

-
On the Manage Venue page, the Venue Details panel shows the current name and location information. Make your changes using the same fields described in the Create section above.
-
Click Update Venue to save.
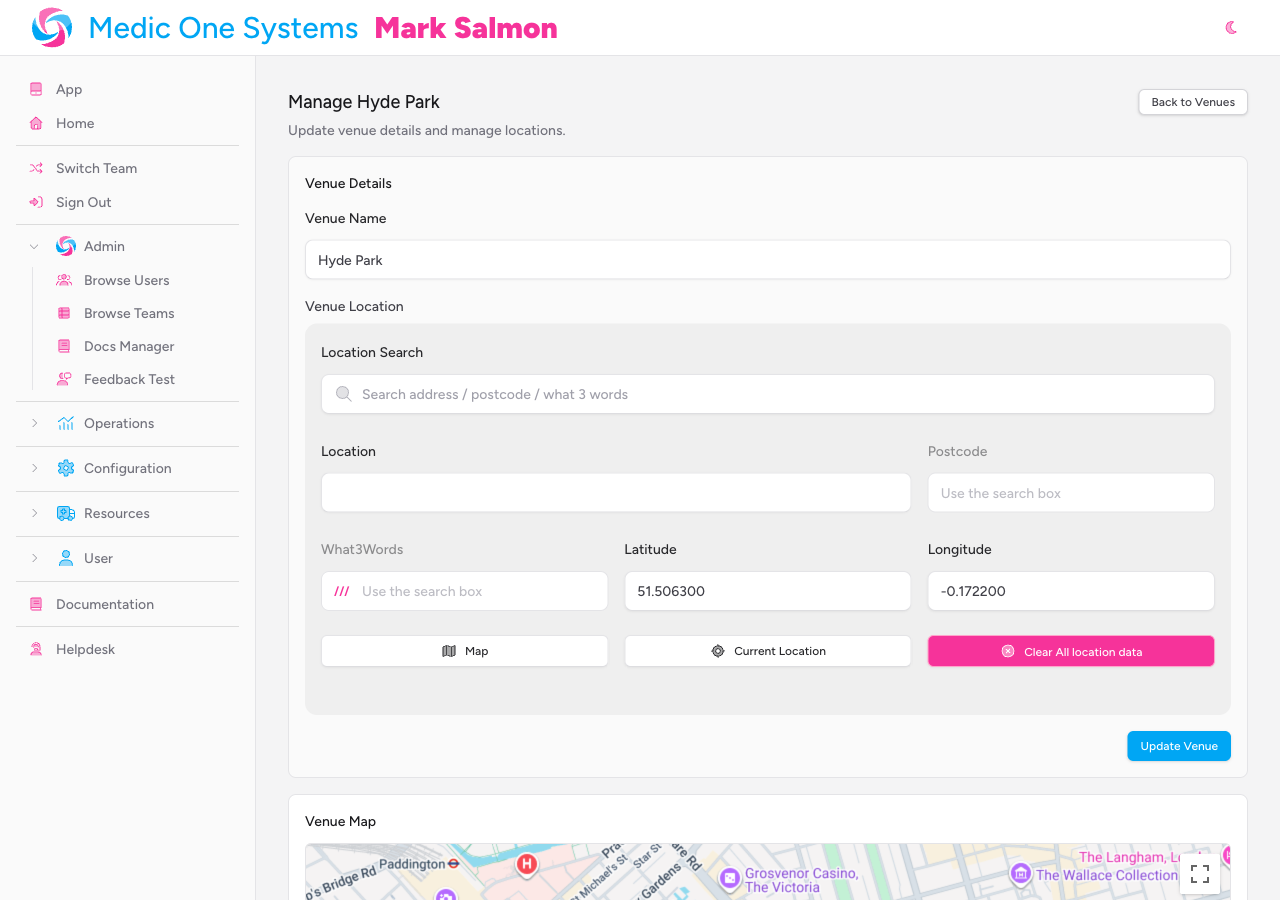
A "Venue updated successfully!" notification confirms the change, and the map below the form will refresh to reflect the updated location.
Deleting a Venue
Deleting a venue is permanent. All locations within the venue will also be deleted. This action cannot be undone.
- From the Venues index, click Delete on the venue you want to remove.
- A confirmation prompt will appear: "Are you sure you want to delete this venue? All associated locations will also be deleted." Click OK to confirm.
The venue and all its locations will be removed, and a "Venue deleted successfully!" notification will appear.
Managing Locations Within a Venue
Once you've created a venue, you can add specific locations within it — individual points on the venue's map, such as medical posts, sector markers, or spectator areas.
Locations are managed from the Manage Venue page. Get there by clicking Manage on any venue card from the Venues index.
The Venue Map
The centre section of the Manage Venue page shows an interactive Venue Map. This automatically centres on the venue's GPS coordinates and displays:
- A blue marker for the venue itself.
- Red markers for each location you've added.
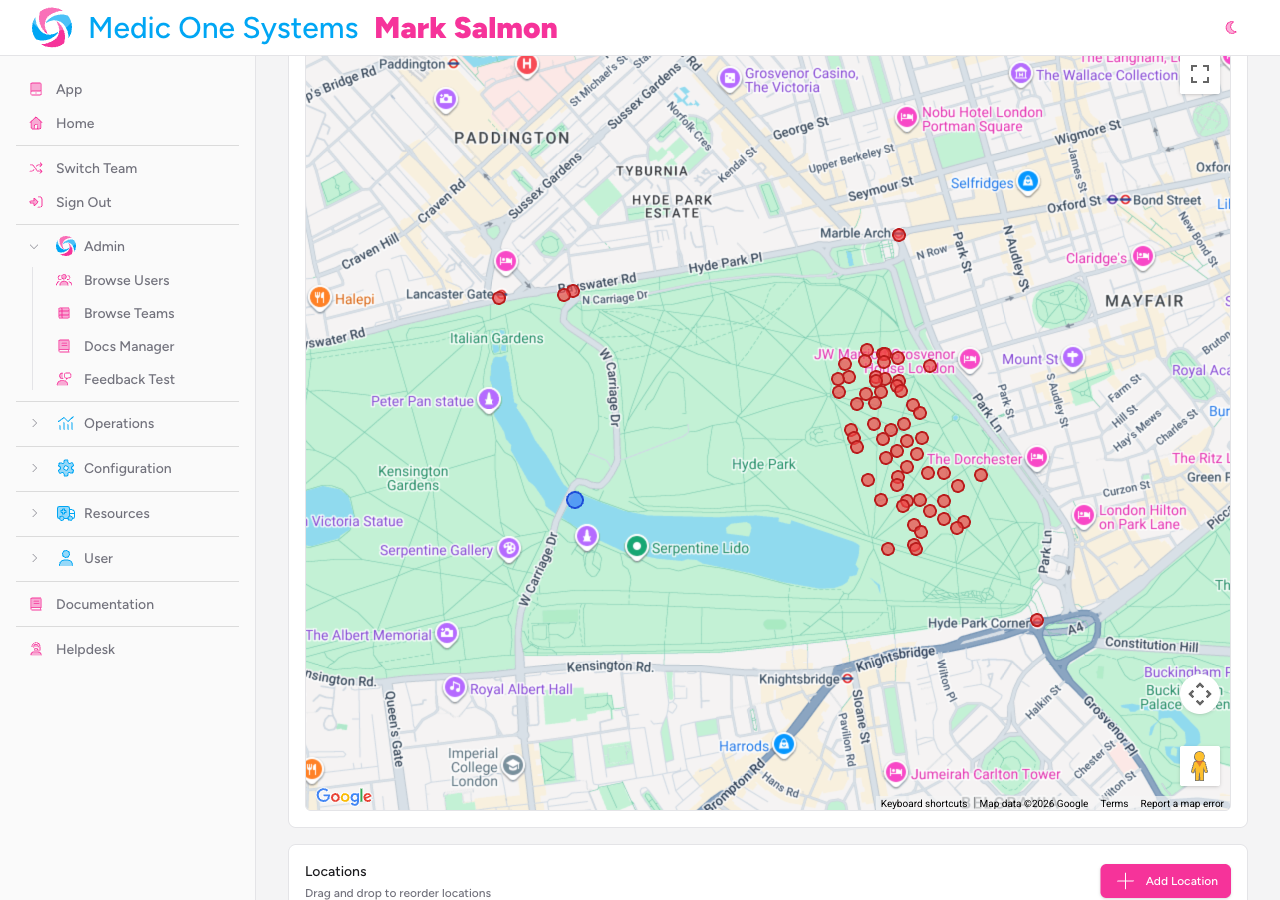
You can click on any location card in the list below the map to centre the map on that location and open its info window. Conversely, clicking a red marker on the map will highlight the corresponding location card in the list.
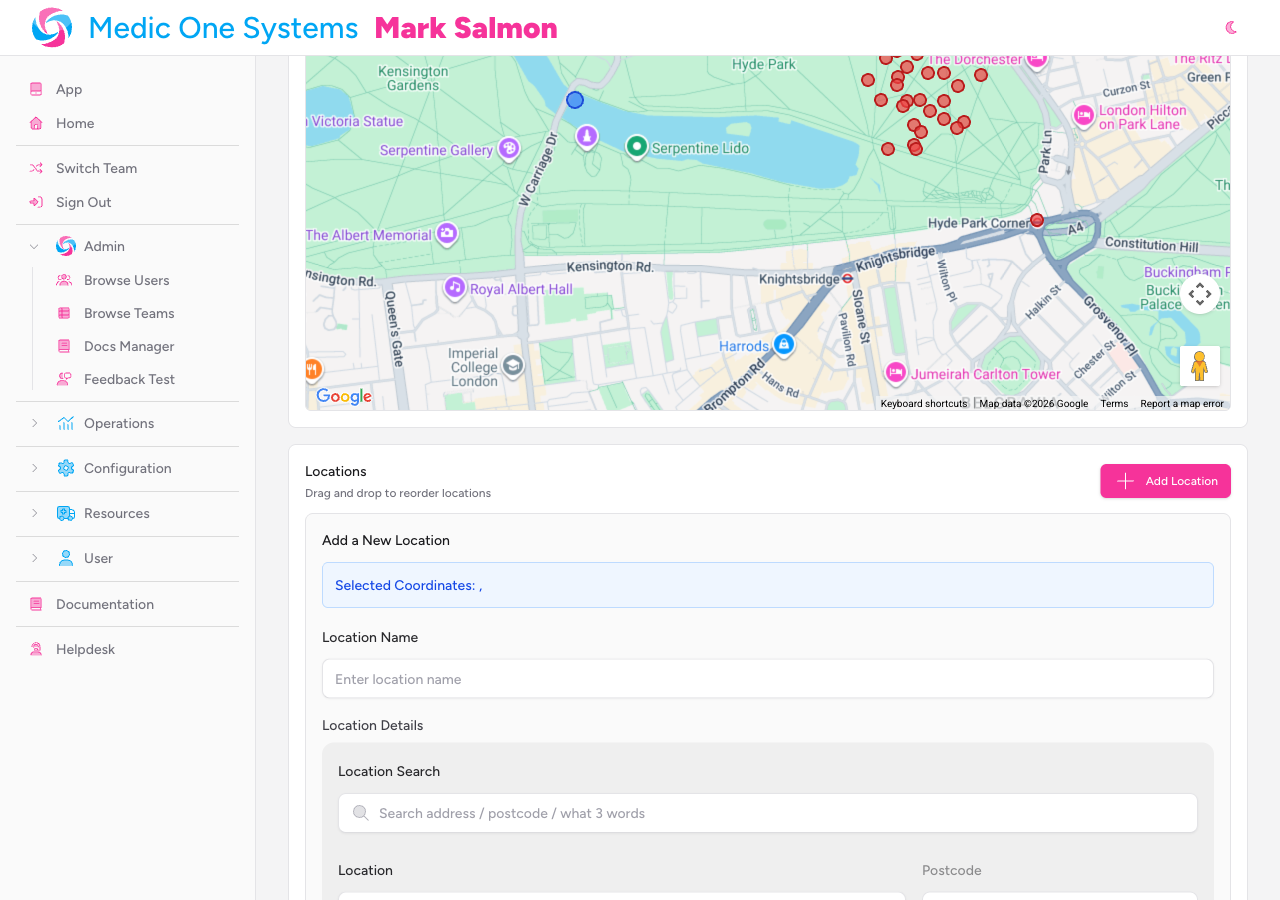
Adding a Location
-
On the Manage Venue page, click Add Location in the top-right corner of the Locations panel.
The Add a New Location form will slide open below the button.
-
The Selected Coordinates display at the top of the form shows the coordinates that will be used for this location. These are pre-set to the venue's own coordinates as a starting point — use the Location Details picker below to move them.
You can also open a new location form by clicking directly on the venue map — the form will open with the coordinates of the spot you clicked already filled in.
-
Enter a Location Name. This is required and must be between 2 and 64 characters.
-
Use the Location Details picker to set where this location sits within the venue. It works exactly like the venue location picker — search by address or what3words, use the map, or enter coordinates directly.
-
Optionally, fill in the Sector field (up to 64 characters) to group or categorise the location within the venue — for example, "North Stand", "Grid", or "Zone A". This is a free-text label.
-
Optionally, add Notes — any extra detail that would be useful for your team, such as access instructions or local hazards.
-
Click Add Location to save.
A "Location added successfully!" notification will appear, the form will close, and the new location will appear in the list and as a red marker on the map.
Location fields summary:
| Field | Required? | Notes |
|---|---|---|
| Location Name | Yes | 2–64 characters |
| Latitude | Yes | Set via the location picker |
| Longitude | Yes | Set via the location picker |
| Sector | No | Up to 64 characters; groups locations within the venue |
| Notes | No | Free text |
Editing a Location
-
In the Locations list, click the pencil icon on the location you want to edit.

The form will open pre-filled with the location's current details.
-
Make your changes across any of the fields — name, coordinates, sector, or notes.
-
Click Update Location to save. A "Location updated successfully!" notification will confirm the change.
To cancel without saving, click Cancel.
Deleting a Location
- In the Locations list, click the red trash icon on the location you want to remove.
- Confirm the prompt: "Are you sure you want to delete this location?"
The location will be removed from the list and from the map. A "Location deleted successfully!" notification will confirm.
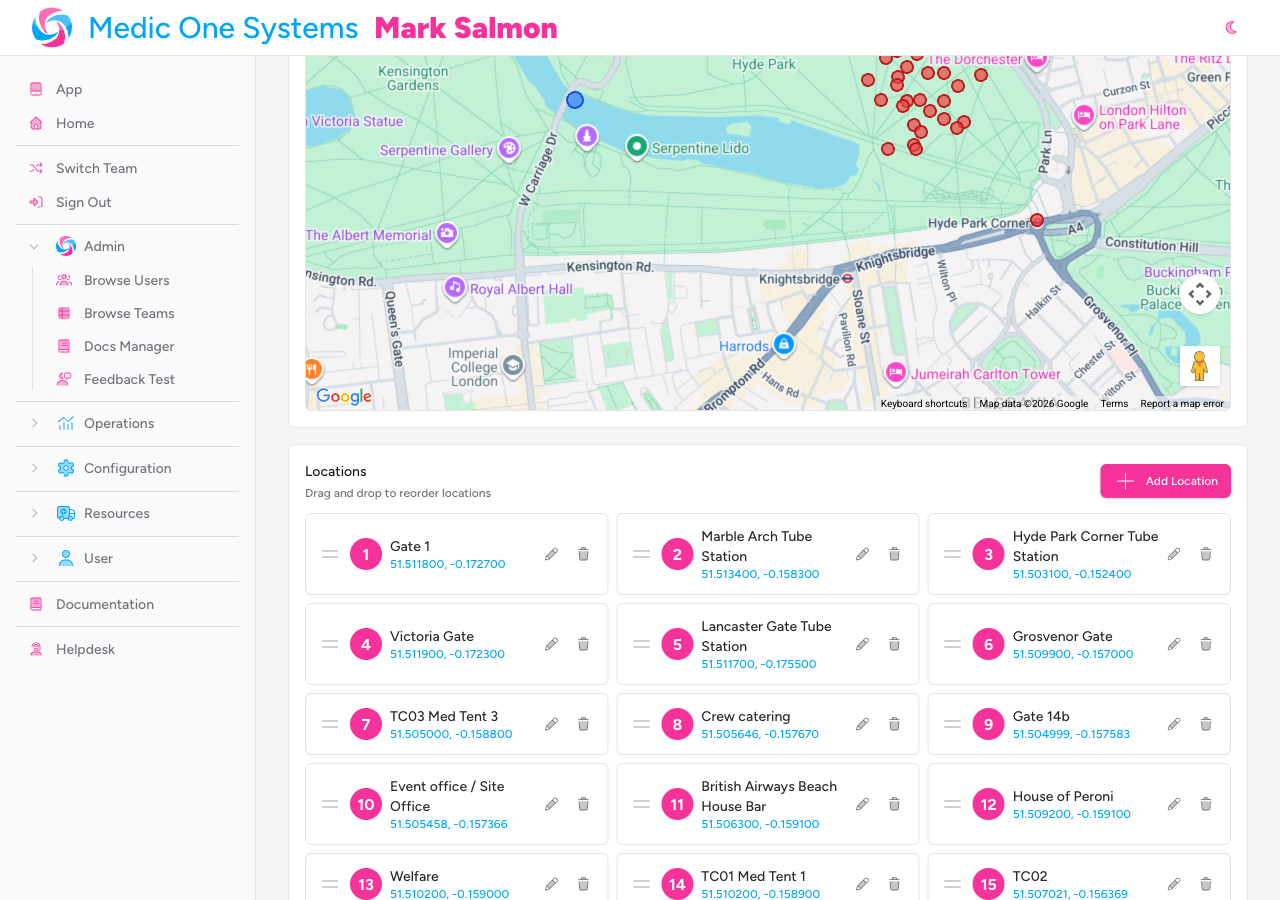
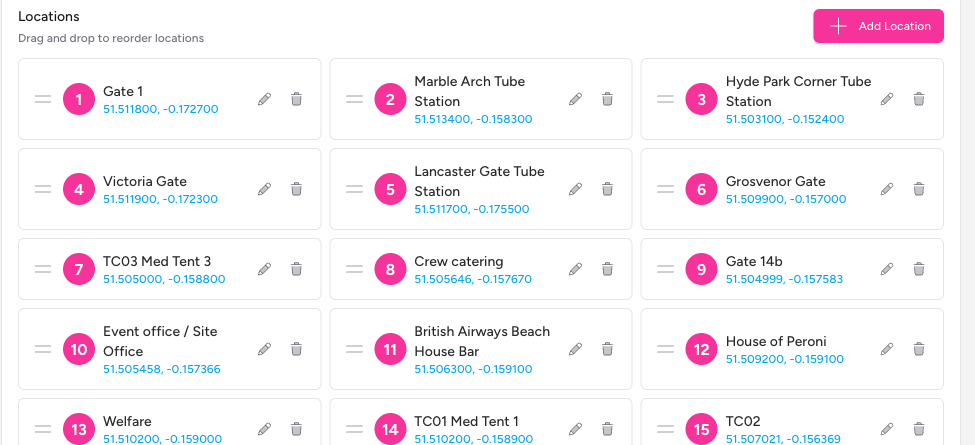
Reordering Locations
Locations are displayed in a numbered order (1, 2, 3...) that also controls how they appear when your team uses the venue during an event.
To reorder, drag a location card to a new position using the grip handle on the left-hand side of each card. The numbering updates automatically once you drop the card into place.
Searching Venues
The Venues index page includes a Search venues... box at the top of the page. Type to filter the venue list by name — results update as you type. Click the X inside the search box to clear the filter and return to the full list.
How Venues Connect to Events
When you create a new event, IndieBase checks whether your team has any venues saved. If it does, a Venue dropdown appears in the New Event form. Selecting a venue from that list links the event to the venue record — you don't need to enter a separate location.
If no venue is selected (or your team has no venues), the standard location picker appears instead.
Venue locations (the individual points you define within a venue) are available for reference when your team is working an event. This is particularly useful for quickly logging where an incident occurred.
Tips & Best Practices
- Set up venues before your event season starts. Getting your regular sites into IndieBase in advance means your team can pick a venue in seconds when creating events, rather than searching for postcodes under pressure.
- Use Sector to organise locations logically. If your venue has distinct areas — circuit sectors, stage zones, spectator enclosures — use the Sector field to group locations. It makes them far easier to scan on the day.
- Add Notes for local knowledge. Use the Notes field to capture things only your team knows: which gate to use, where the nearest defibrillator is, access codes. This information travels with the location record.
- Click the map to place new locations quickly. On the Manage Venue page, clicking directly on the map opens the Add Location form with coordinates pre-filled — much faster than searching an address for a point in the middle of a field.
- The map updates in real time. Every time you save a change — adding, editing, deleting, or reordering a location — the venue map refreshes automatically.
Troubleshooting
"Venues" doesn't appear in the sidebar. Venue management requires an active subscription. Check your team's subscription under Billing Portal in the Configuration section of the sidebar, or speak to your team owner.
The "Add New Venue" button isn't visible. You need to be a team owner or have the admin role. If you're a standard team member, you can view the venues list but not make changes. Ask your team owner to update your role.
The location search isn't returning any suggestions. Suggestions only appear after you've typed at least three characters. Try a more specific search term, or use the Map button to pin the location manually instead.
The Latitude or Longitude field is showing a validation error when I try to save. Both coordinates are required and must be valid numbers. If you've typed in the Location Search box but haven't selected a suggestion, the coordinate fields won't be populated — make sure you select an address from the dropdown rather than just typing and moving on.
I deleted a location by mistake. Deleted locations cannot be recovered from within IndieBase. You'll need to re-add the location manually.
The venue map isn't loading. The map requires an internet connection. If you're offline, the map won't render, but you can still manage venue and location details — the form fields work without a live connection.
- Setting Up a New Event — how venues are selected when creating an event
- Customising Your Team — overview of other team settings available to administrators