Table of Contents
Vehicles
How to manage your team vehicles and assign them to crews
Manage your team's fleet of vehicles so that crews can log which vehicle they responded in during a job.
Vehicles
Manage your team's fleet of vehicles so that crews can be assigned to them during events.
Overview
The Vehicles feature gives you a shared list of vehicles that belongs to your team. Once you've added your vehicles, they become available to select when you're setting up or editing a crew at an event. This keeps your job and patient records accurate — you can always see which vehicle a crew was operating, and filter your job and patient logs by vehicle after the fact.
Active subscription required. Vehicles are available to teams with an active subscription. If you don't see the Vehicles option in your navigation, check your team's subscription status.
Getting to the Vehicles page
In the left-hand navigation, expand the Resources section and click Vehicles (look for the ambulance icon).
This takes you to the Manage Vehicles page for your current team.
Adding a vehicle
-
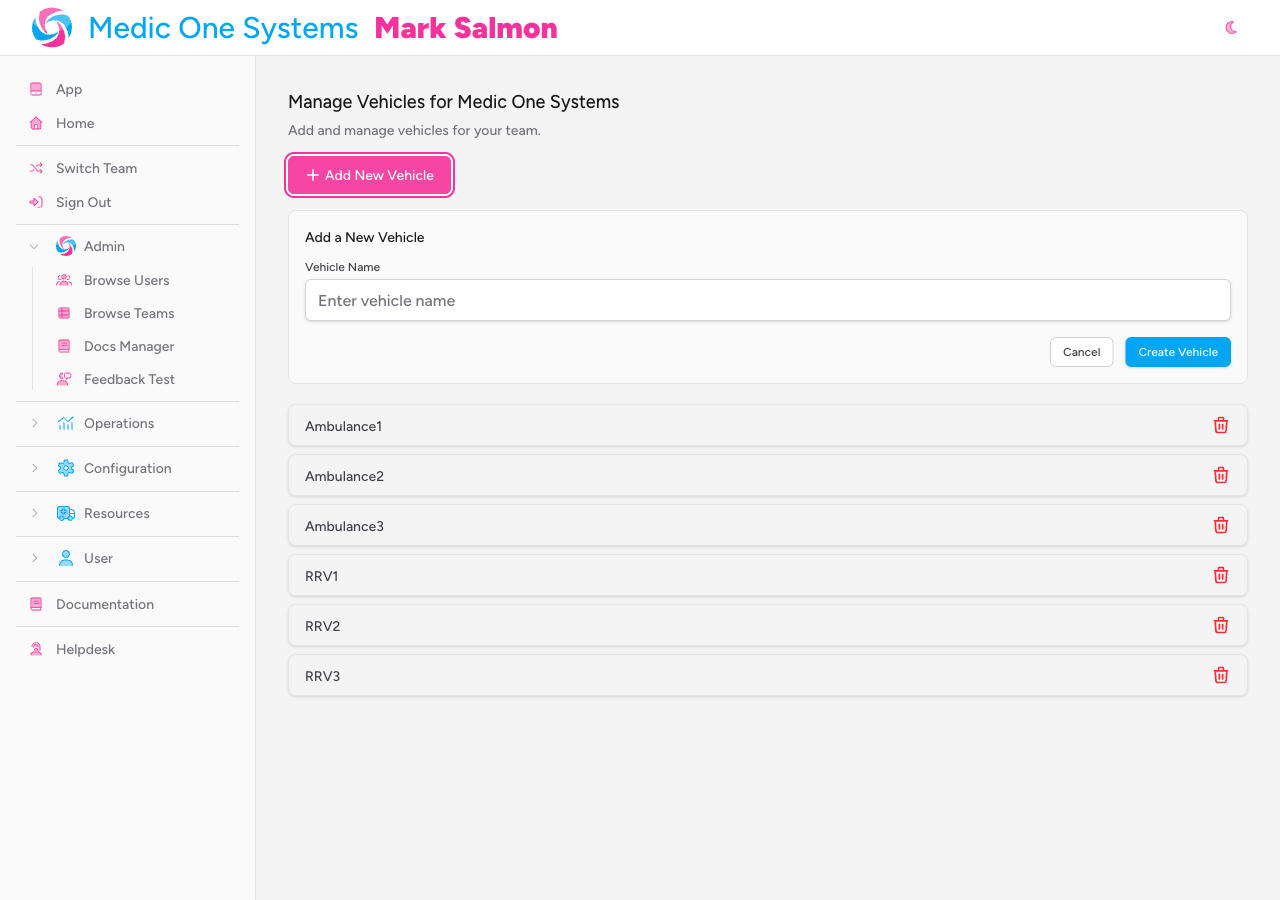
Click the Add New Vehicle button at the top of the page.
A form panel expands below the button.
-
Enter the vehicle's name in the Vehicle Name field. This is a free-text field — use whatever naming convention works for your team (registration plate, call sign, vehicle type, or a combination).
-
Click Create Vehicle.
The form closes and your new vehicle appears in the list immediately.
The Vehicle Name field is required and has a maximum length of 255 characters. If you submit the form without entering a name, you'll see a validation message asking you to fill it in.
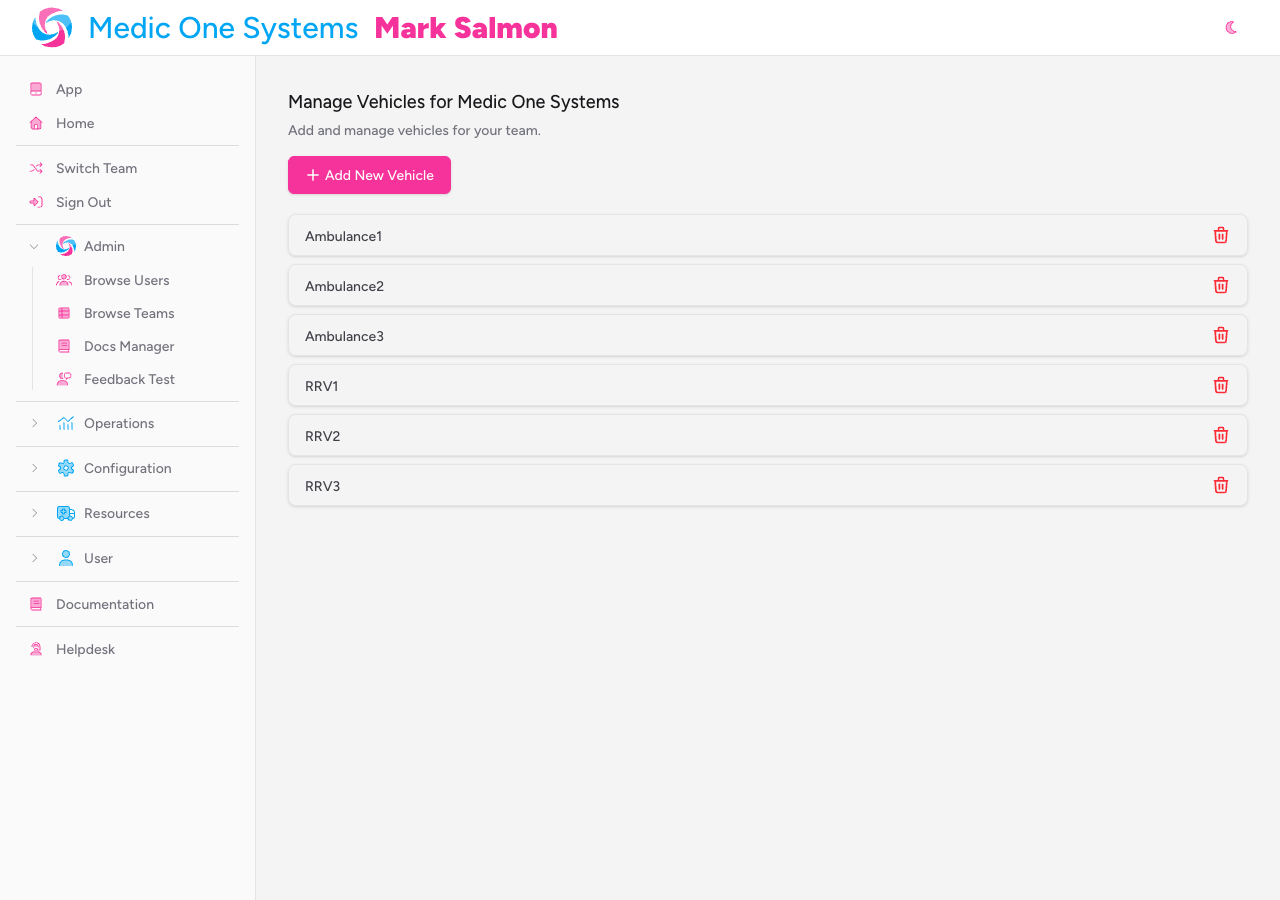
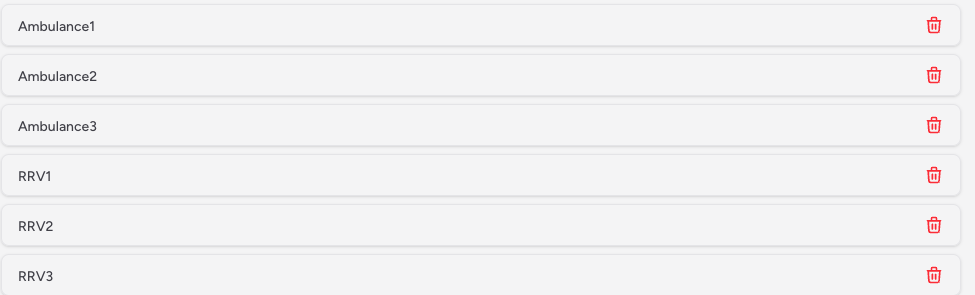
Your vehicle list
All vehicles for your team are displayed on this page as a simple list. Each row shows the vehicle name. There's no limit to how many vehicles you can add.
Deleting a vehicle
Click the red delete icon (bin) on the right-hand side of any vehicle's row.
The vehicle is removed immediately — there's no confirmation prompt, so double-check before clicking.
Deleting a vehicle doesn't remove it from the history of crews it was previously assigned to. IndieBase uses soft deletion, so historical records that reference a deleted vehicle continue to display the vehicle name correctly. You simply won't be able to assign that vehicle to new crews going forward.
How vehicles connect to crews
Vehicles aren't assigned to specific events — they're a team-wide resource. When you're at an event and you create or edit a crew, you can select a vehicle from your team's vehicle list.
To assign a vehicle to a crew:
- Open an event and go to the Crews section.
- Click Add Crew (or click the edit option on an existing crew).
- In the crew form, find the Vehicle dropdown alongside the Callsign field.
- Select the appropriate vehicle from the list.
- Save the crew.
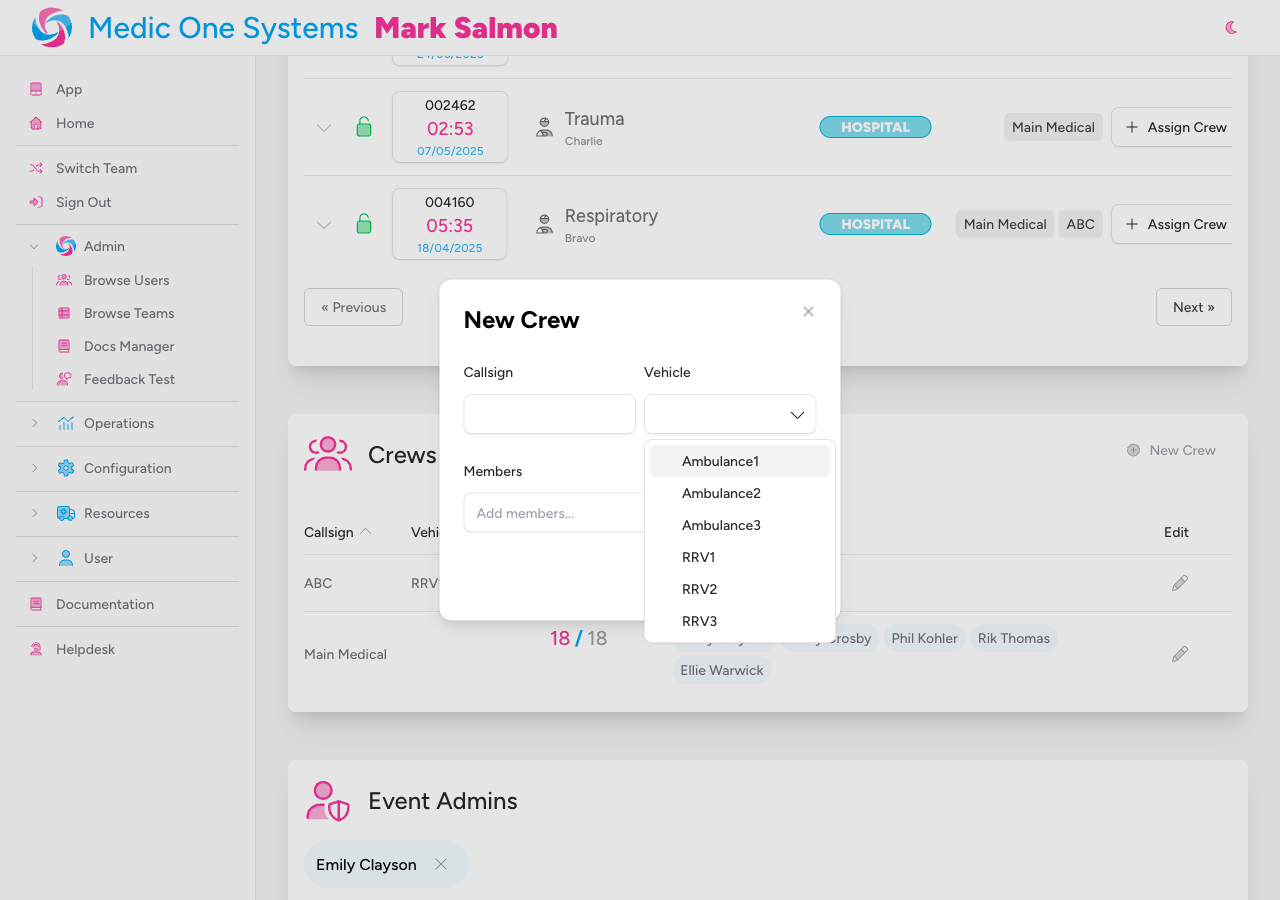
The vehicle field is optional — you can create crews without assigning a vehicle if needed. The Vehicle dropdown also includes a clear option if you need to remove a vehicle assignment from a crew.
Filtering jobs and patients by vehicle
Once vehicles are assigned to crews, they flow through to your activity records automatically.
- In Browse Jobs, you can filter the jobs table by vehicle name.
- In Browse Patients, you can filter the patients table by vehicle name.
This makes post-event reporting straightforward — you can pull up everything that happened on a specific vehicle during an event or across a date range.
Tips
- Use consistent naming from the start. Once vehicle names appear in historical records, changing them requires deleting and recreating the vehicle, which won't update past assignments.
- If your team uses call signs for vehicles, consider including the vehicle type as well (for example, "Alpha 1 — Ambulance") to make the dropdown easier to navigate at busy events.
- Vehicles are scoped to your team, so only members of your team can see or use them.
Related: Setting Up a New Event