 IndieBase

Table of Contents
Sharing a PRF via Portal
Create a secure, time-limited link so an external clinician can retrieve a patient report form without an IndieBase account.
Generate a one-time reference code that lets an external clinician — such as a hospital doctor — securely download a patient's report form, with no IndieBase login required.
Overview
The PRF Portal lets you hand off a completed Patient Report Form to someone outside your team. You create a time-limited link from the Patient Reports panel, share the reference code and a confirming detail with the recipient, and they retrieve the PDF directly from the portal.
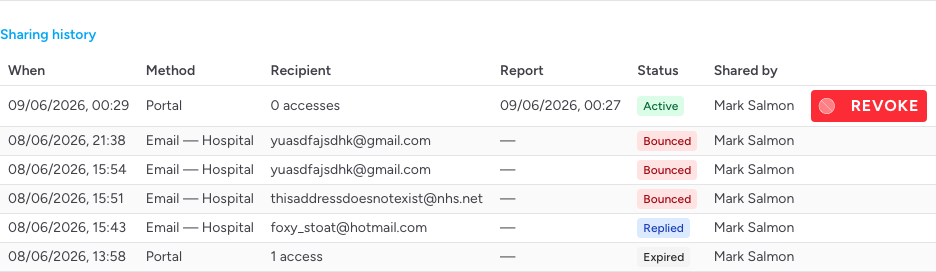
Every access is logged. Links expire after your team's configured duration (set in Team Settings) and can be revoked at any time from the Sharing history table in the Patient Reports panel.
This feature must be enabled by a team admin before the Send PRF to Portal button becomes visible. See PRF Distribution Setup.
Before You Start
- The PRF Portal must be enabled for your team in Team Settings > Information Governance > PRF Distribution.
- You must have access to view the patient record.
- The patient record must have at least one generated report. The Send PRF to Portal button is disabled until a report is available.
Creating a Portal Link
Step 1: Open the Patient Reports panel
Navigate to the patient record and open the Patient Reports panel from the panel navigation.
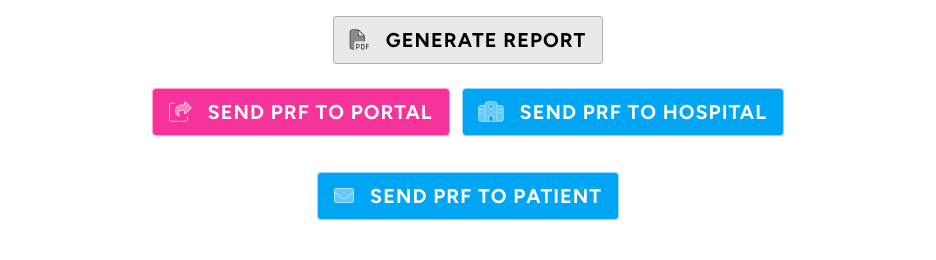
The panel shows the Generate Report button at the top, and below it the three sharing buttons — Send PRF to Portal, Send PRF to Hospital (if enabled), and Send PRF to Patient (if enabled) — depending on which features your team has turned on.
Step 2: Generate a report (if needed)
If no reports have been generated yet, click Generate Report. Wait for the report to appear in the grid below — this usually takes a few seconds.
The Send PRF to Portal button is disabled until at least one report exists. Once a report is visible in the grid, the button becomes active.
Step 3: Open the sharing dialog
Click Send PRF to Portal.
The Send PRF to Portal dialog opens.
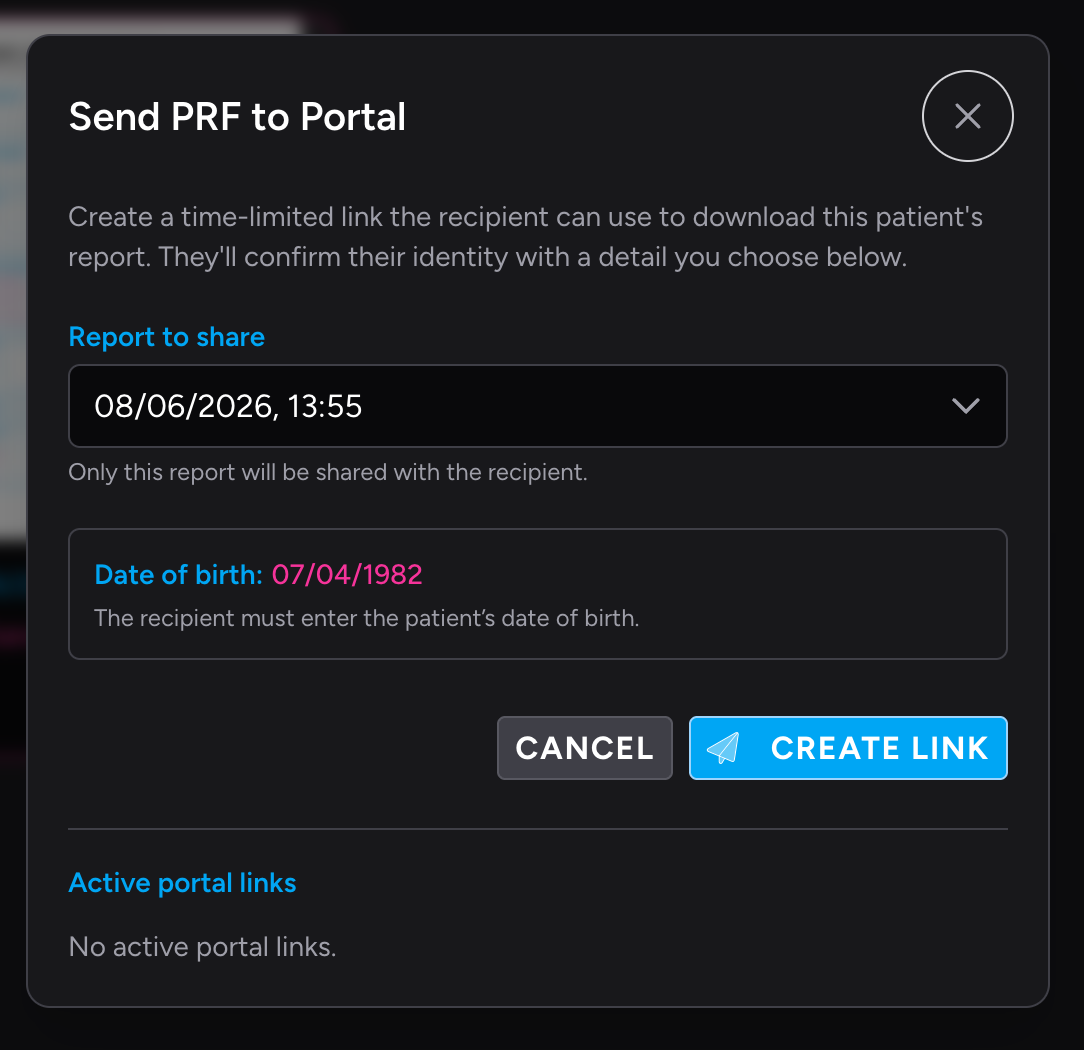
Use the Report to share dropdown to choose which generated report to send. Reports are listed by the date and time they were created, newest first. Only the selected report will be accessible via the link you create.
Step 5: Set the confirming detail
The recipient will need to confirm one piece of patient information before the portal lets them download the report. The system chooses this automatically:
- If the patient record has a date of birth, the confirming detail is set to Date of birth. This is shown read-only in the dialog — you do not type it, and you do not need to share the date of birth separately (the recipient should already know it as a clinician).
- If there is no date of birth on the record, the confirming detail is a Pass phrase. Enter a word or short phrase in the Pass phrase field. You must share this pass phrase with the recipient separately — it is not included in the relay message.
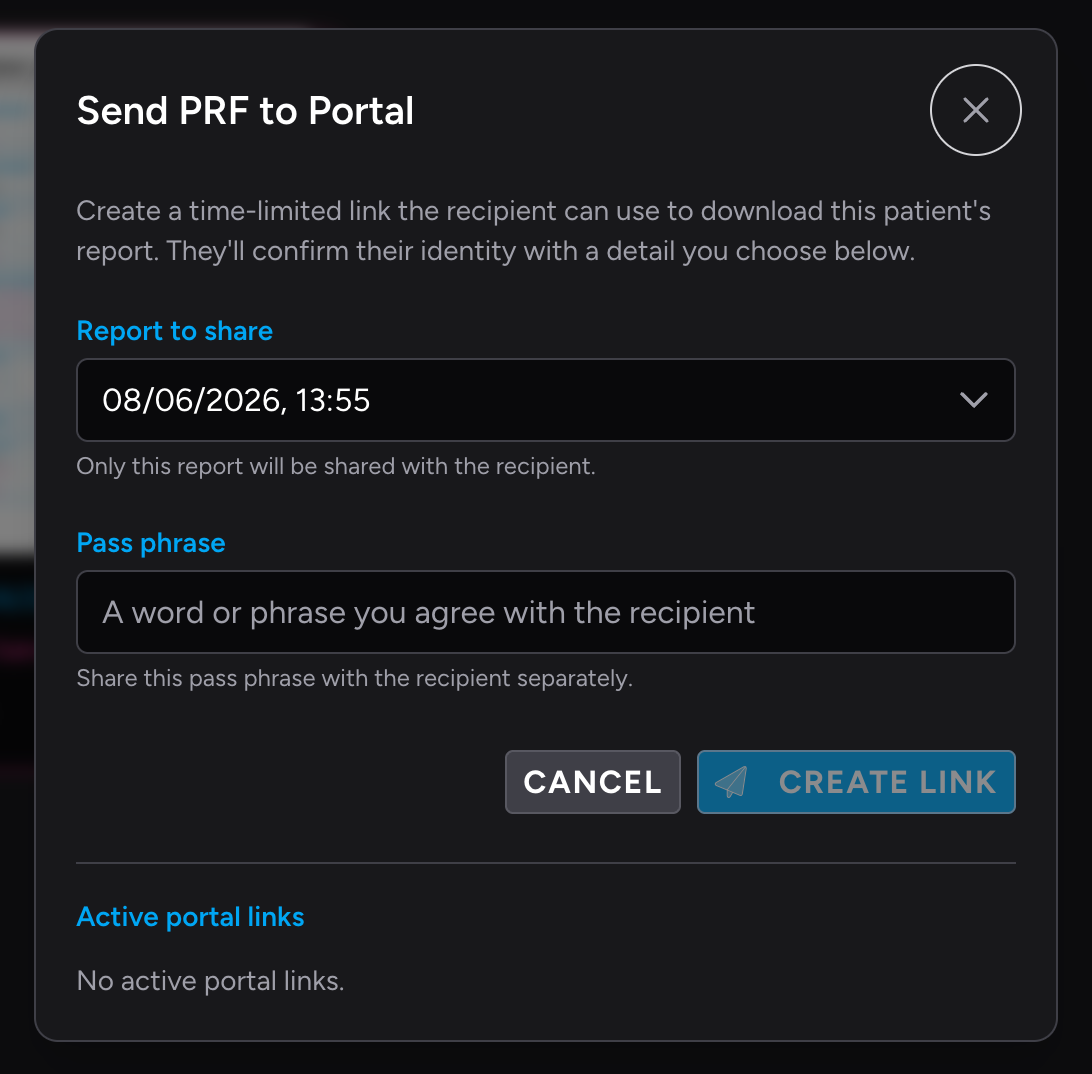
If you are using a pass phrase, share it via a different channel to the link itself — for example, read it out over the phone while sending the link by message. This keeps the two factors separate.
Step 6: Create the link
Click Create Link.
The dialog switches to the reference screen.
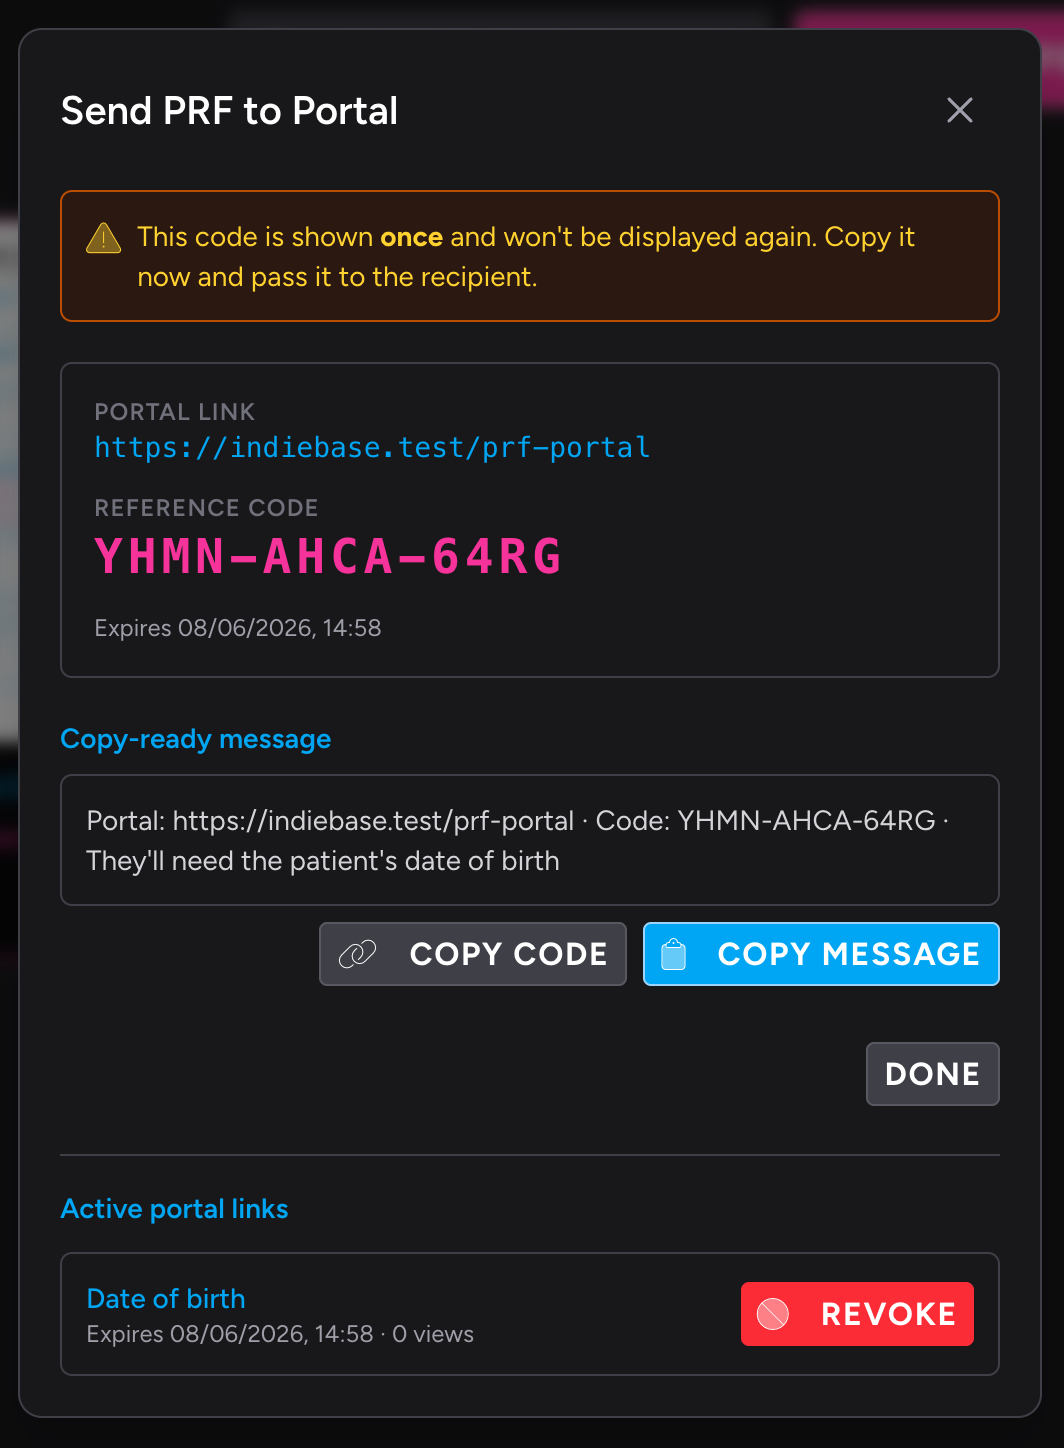
The reference code is shown only once. Copy it now — it will not be displayed again once you close this dialog.
The reference screen shows everything the recipient needs:
| Item | What it is |
|---|---|
| Portal link | The URL to the public portal page |
| Reference code | A code in the format K7PX-9QF2-RM4T that the recipient types on the portal |
| Expiry | When the link stops working |
| Copy-ready message | A single line combining the link, code, and what confirming detail the recipient needs |
The easiest way to share is to click Copy message and paste it into your handover message or secure messaging system. The copy-ready message looks like this:
Portal: https://portal.example.com/prf · Code: K7PX-9QF2-RM4T · They'll need the patient's date of birth
If you only want to share the code, click Copy code instead.
Once you have copied what you need, click Done to close the dialog.
Managing Active Links
Active portal links and their history are now part of the unified Sharing history table at the bottom of the Patient Reports panel. You no longer need to reopen the sharing dialog to manage them.
The table shows all shares across all methods (portal, hospital email, patient email) for this patient. Portal rows display:
- Method — "Portal"
- Recipient — the number of times the link has been accessed (e.g. "3 accesses")
- Status — "active" while the link is live
- Revoke — a button to cancel the link before it expires
Revoking a link
To cancel a link before it expires, click Revoke in its row. The link stops working immediately.
Security Notes
- The reference code is shown once and is not stored in the UI after you close the dialog.
- The confirming detail (date of birth or pass phrase) acts as a second factor — without it, the reference code alone is not enough to download the report.
- Five consecutive wrong attempts at the confirming detail locks the link permanently.
- Every access to the portal is audit-logged against the patient record.
- Disabling the PRF Portal in Team Settings instantly revokes all active links across your entire team.
Tips & Best Practices
- Generate the report before you arrive at handover. Report generation takes a few seconds — if you know a patient is being conveyed, generate the report while en route so everything is ready.
- Use the copy-ready message. It combines the link, code, and instructions for the recipient in one piece of text. Paste it into a handover message or secure messaging system.
- Revoke links you no longer need. If a handover fell through or the recipient confirmed they have the document, click Revoke in the Sharing history table to clean up access.
- Check the access count. If a portal row shows zero accesses after the recipient says they downloaded the report, they may have used the wrong link or encountered an error. Create a new link if needed.
Troubleshooting
The Send PRF to Portal button is not visible.
The button only appears when the PRF Portal feature is enabled for your team. Ask a team admin to check Team Settings > Information Governance > PRF Distribution.
The Send PRF to Portal button is greyed out.
The button is disabled until at least one report has been generated for this patient. Click Generate Report first, wait for it to appear in the grid, then try again.
"Could not create the portal link. Please try again."
This is usually a temporary error. Try clicking Create Link again. If it persists, reload the app and try once more. If the error continues, contact your team administrator.
The recipient says the link is not working.
Check the Sharing history table. If the portal row for that link shows as expired or has no Revoke button (meaning it is no longer active), create a new link. If it is still listed as active, confirm the recipient is entering the confirming detail correctly — for a date of birth, the portal expects the format DD/MM/YYYY.
- PRF Distribution Setup — how admins enable the feature and set link duration
- Retrieving a PRF from the Portal — the guide to share with the external recipient
- Sending a PRF to Hospital — the email-based route for hospital handovers
- Sending a PRF to Patient — how to email a report to the patient directly