Table of Contents
Custom Panels
How to create custom data panels to capture team-specific information on patient records
Custom Panels
Custom Panels let you add your own data-collection sections to patient records, built around the fields your team actually needs.
Overview
No two teams are exactly alike. IndieBase's standard panels cover the common clinical ground, but some teams need to capture information that falls outside that — specialist triage scores, event-specific data, research fields, or anything else that matters to your operation.
Custom Panels let you define entirely new sections that appear on patient records alongside the standard ones. You choose the panel's name, the fields it contains, and where it sits in the record. Once configured, the panel is available to attach to one or more of your team's record templates, and from there it appears for your crew whenever they're working on a patient record that uses that template.
Custom Panels is available to teams with an active subscription. On the free plan the feature is accessible but no panels can be created.
Before You Start
- You must be a team administrator (or team owner) to create and configure custom panels.
- Your team must have an active subscription. The number of panels you can create depends on which plan your team is on — the current count and your allowance are shown on the Custom Panels page.
- Once a custom panel is configured, it also needs to be attached to a record template before it will appear on patient records. See Template Config for how to do that.
Getting to Custom Panels
From the sidebar, expand the Configuration section and click Custom Panels.
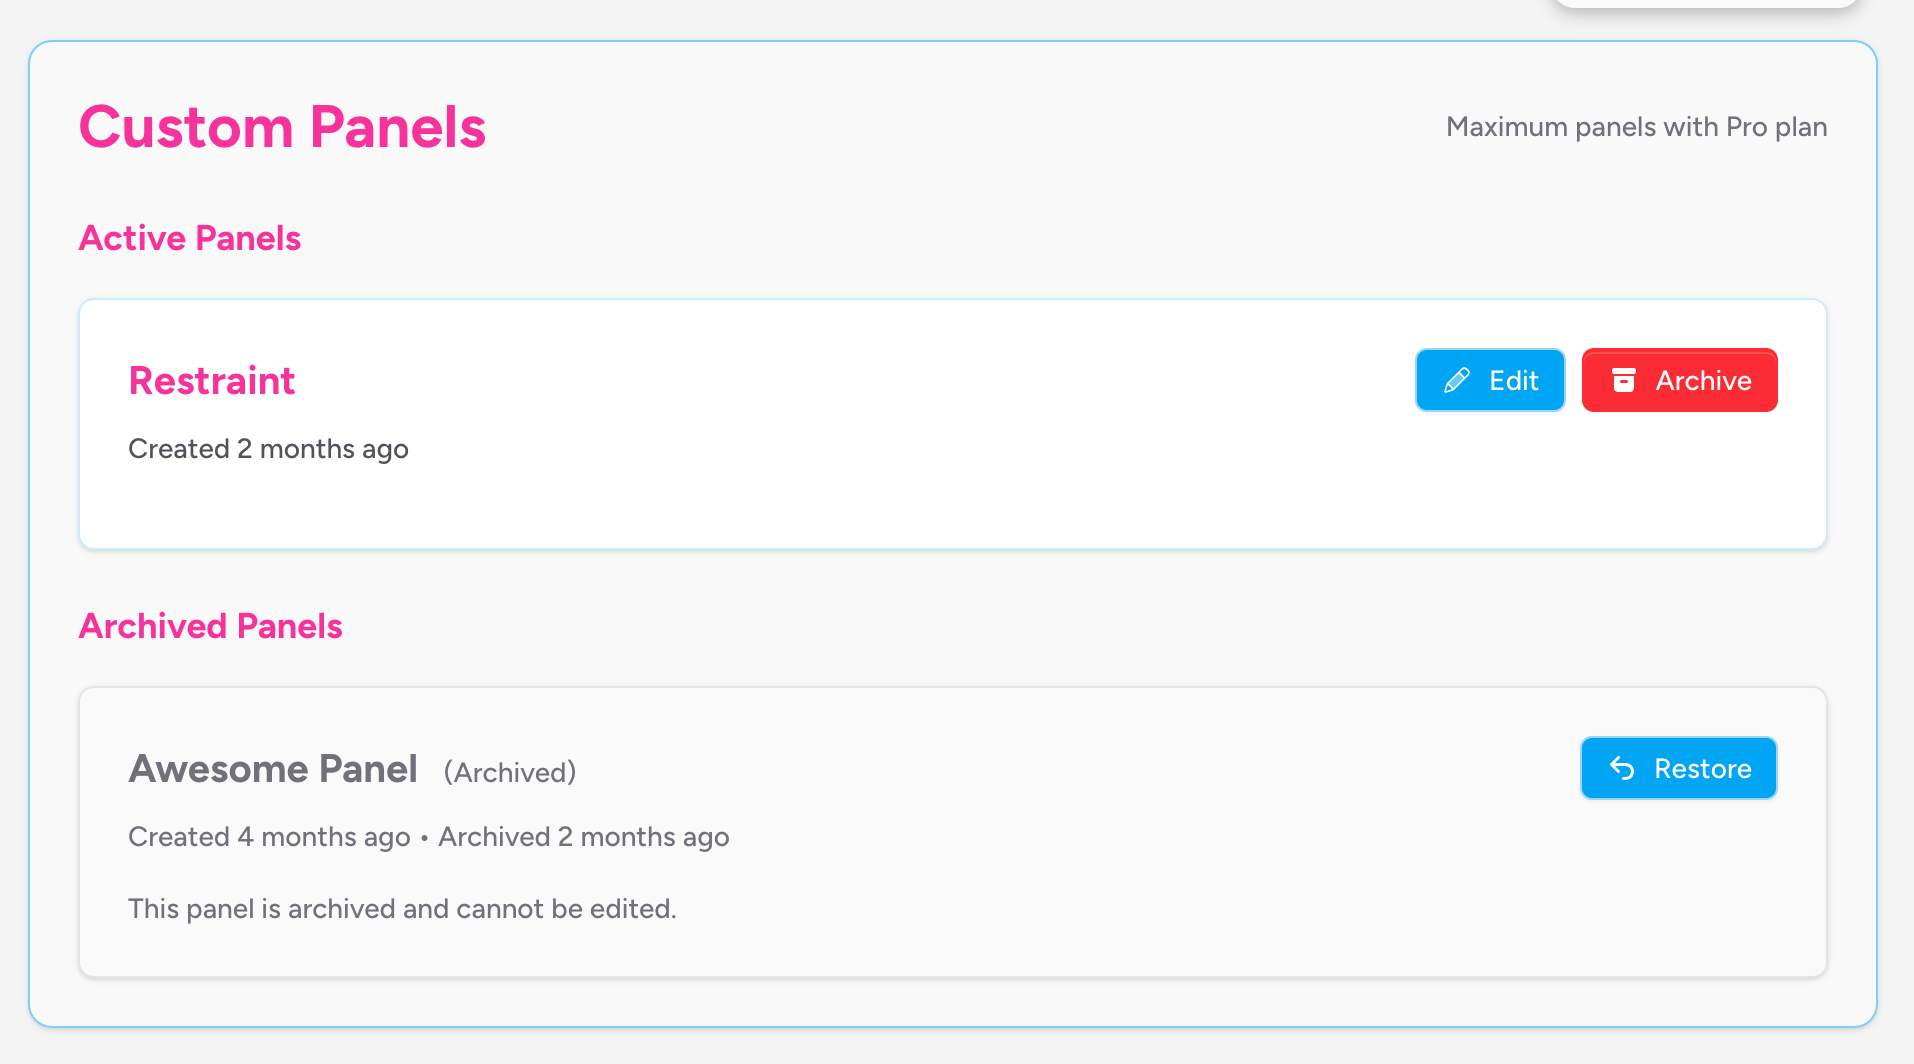
This takes you to the Custom Panels page, which shows all your active panels and — below those — any archived panels. If you haven't created any panels yet, you'll see an empty state with a prompt to get started.
The header of the page shows how many panels you've used out of your plan allowance.
Creating a Custom Panel
-
In the top-right corner of the page, enter a name for your panel in the New panel name field. This is the name that will appear as the panel's heading on patient records, so make it meaningful — for example, "Triage Assessment" or "Event Specific Data".
-
Optionally, enter a short description in the Panel description (optional) field. This appears on the Custom Panels management page to help distinguish panels at a glance.
-
Click Create Panel.
The panel is created immediately and appears in the Active Panels grid. It starts with all fields hidden, so you'll need to open it and configure it before it's useful.
Panel names must be unique within your team. If you try to create a panel with a name that already exists — including archived panels — you'll see an error.
Configuring a Panel
Click Edit on any active panel card to open the panel editor.
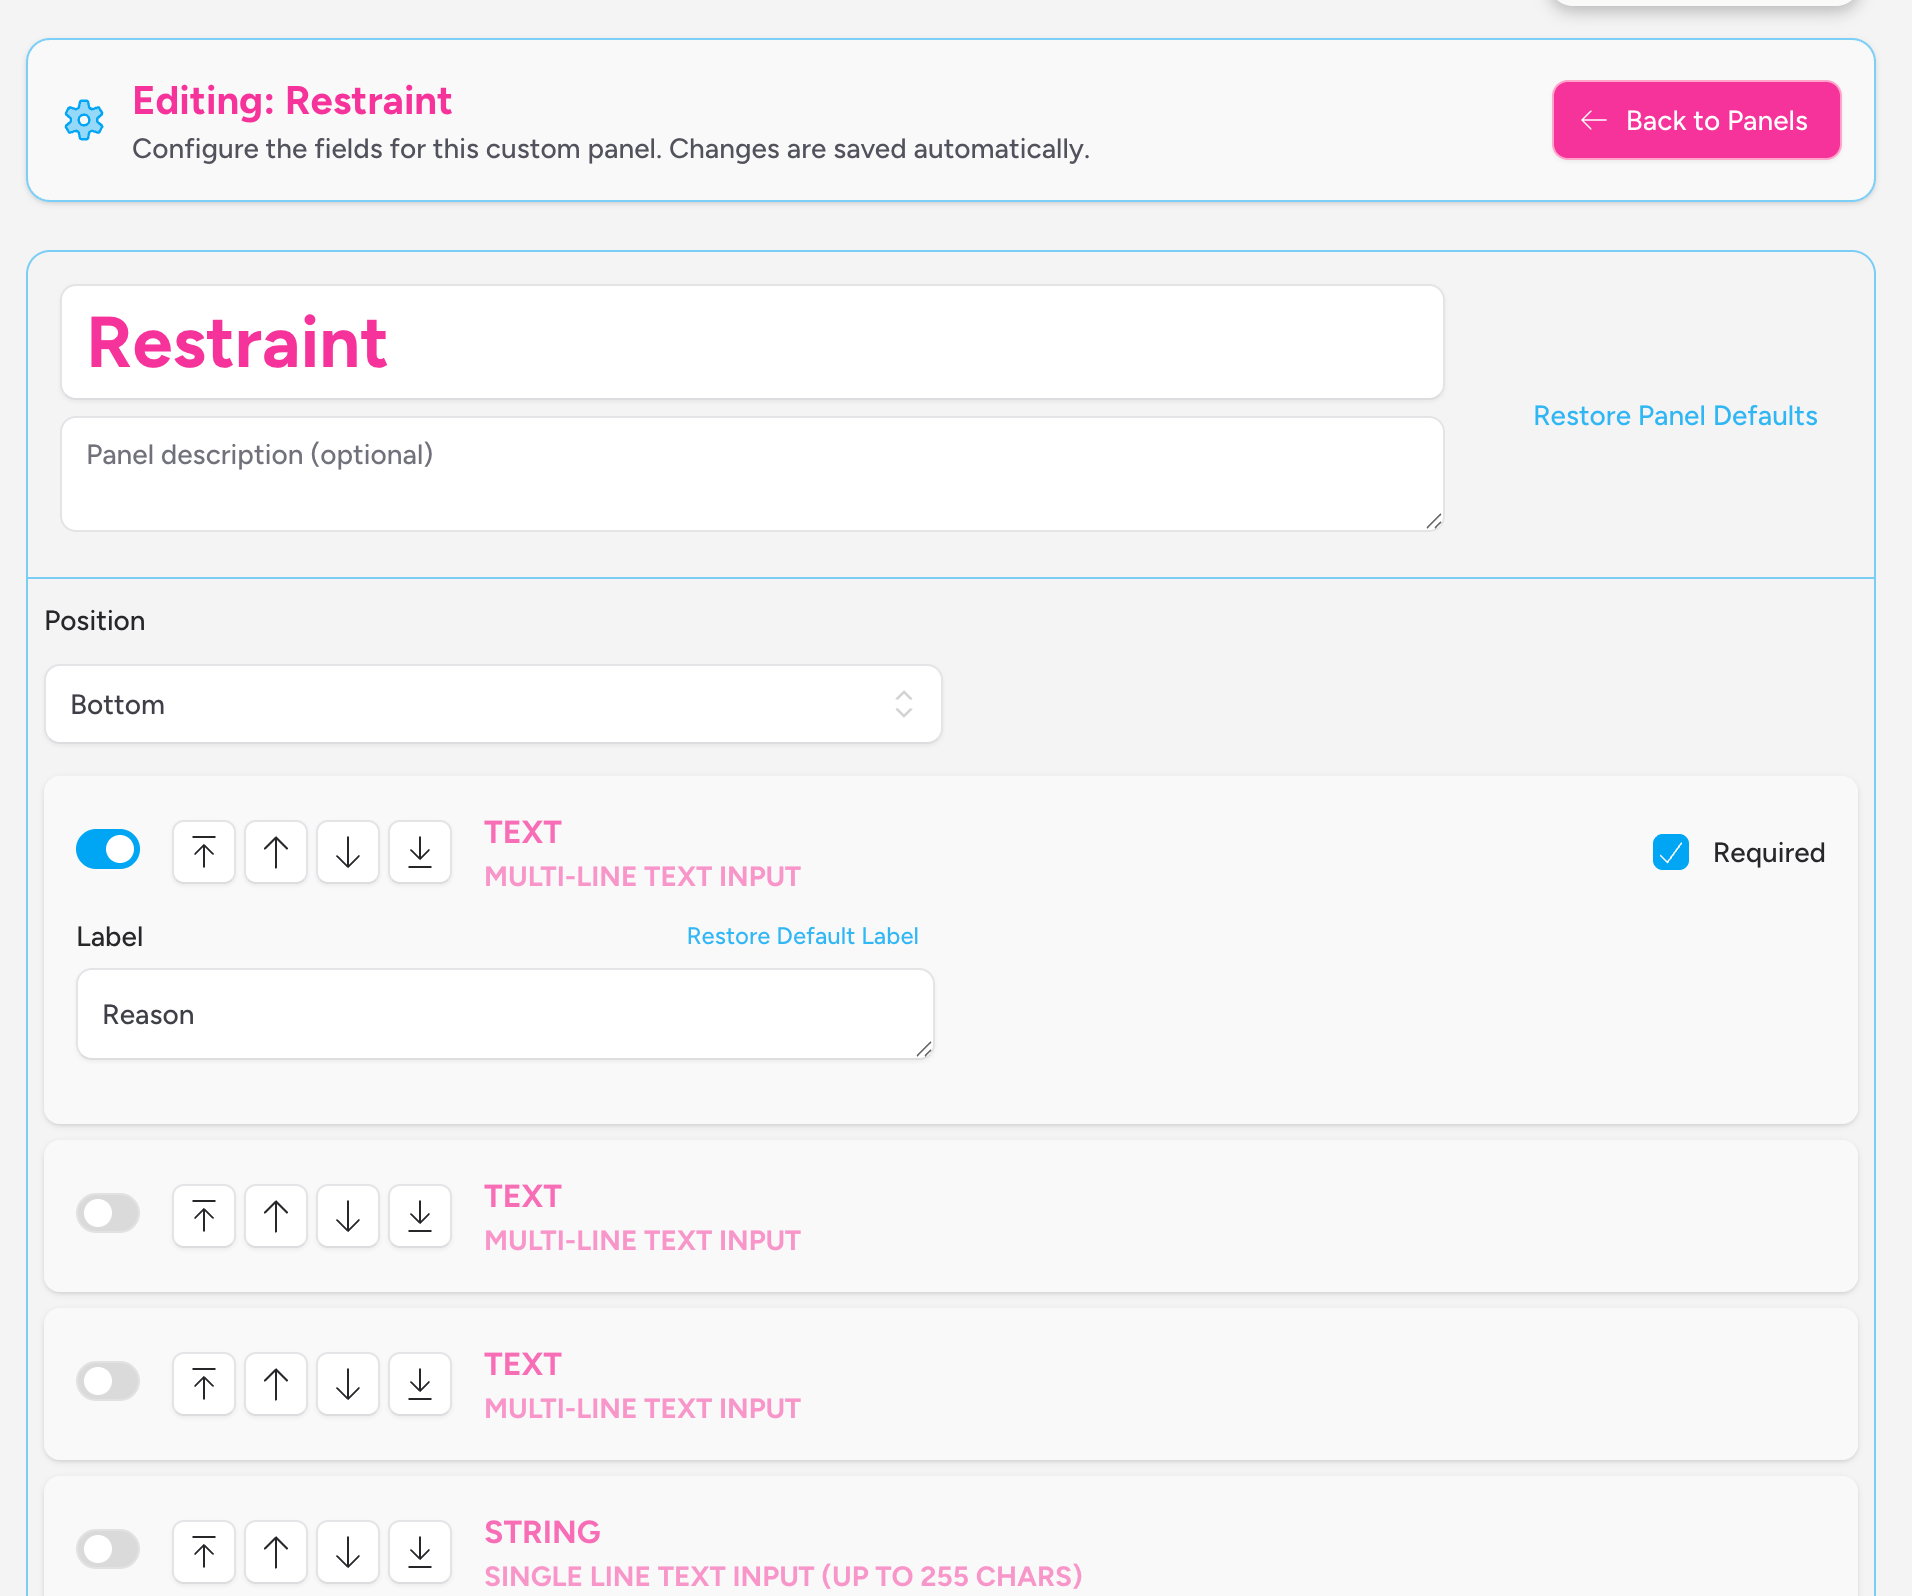
The editor opens in full, replacing the panel list view. A Back to Panels button in the top-right returns you to the list at any time.
Panel title and description
At the top of the editor you can update the panel's title and description. The title field is large and prominent — it's what will display as the section heading on a patient record. Click outside the field (or tab away) to save your change.
Changes in the editor save automatically as soon as you move away from a field. There is no separate save button.
Position
Use the Position dropdown to control where the panel appears relative to the standard sections on a patient record:
- Top — the panel appears near the top of the record, before the standard clinical panels.
- Bottom — the panel appears near the bottom, after the standard panels.
Configuring fields
The fields section is the heart of the editor. Each custom panel has a fixed set of available field slots — you activate and configure only the ones you need, and hide the rest.
The full set of available field slots is:
| Type | Slots available | What it is |
|---|---|---|
| String | 6 | Single-line text input (up to 255 characters) |
| Integer | 6 | Whole number input with increment/decrement controls |
| Text | 3 | Multi-line text input, spans the full width of the panel |
| Boolean | 3 | Yes/No checkbox |
| Datetime | 3 | Date and/or time input |
All field slots are hidden by default. To use a field, toggle the switch on the left of that field row to the active state.
For each active field, you can:
Set a label — This is the text that appears next to the field on the patient record. Give it a clear, descriptive name. If you clear the label entirely, it resets to the default name automatically. You can also click Restore Default Label to reset it manually.
Mark it as required — Tick the Required checkbox to make the field mandatory. If a required field is left blank, the record cannot be submitted until it's filled in.
Reorder fields — Use the arrow buttons to move a field up, down, to the top, or to the bottom of the panel. The order you set here is the order the fields appear on the patient record.
Field-specific options
Some field types have additional settings:
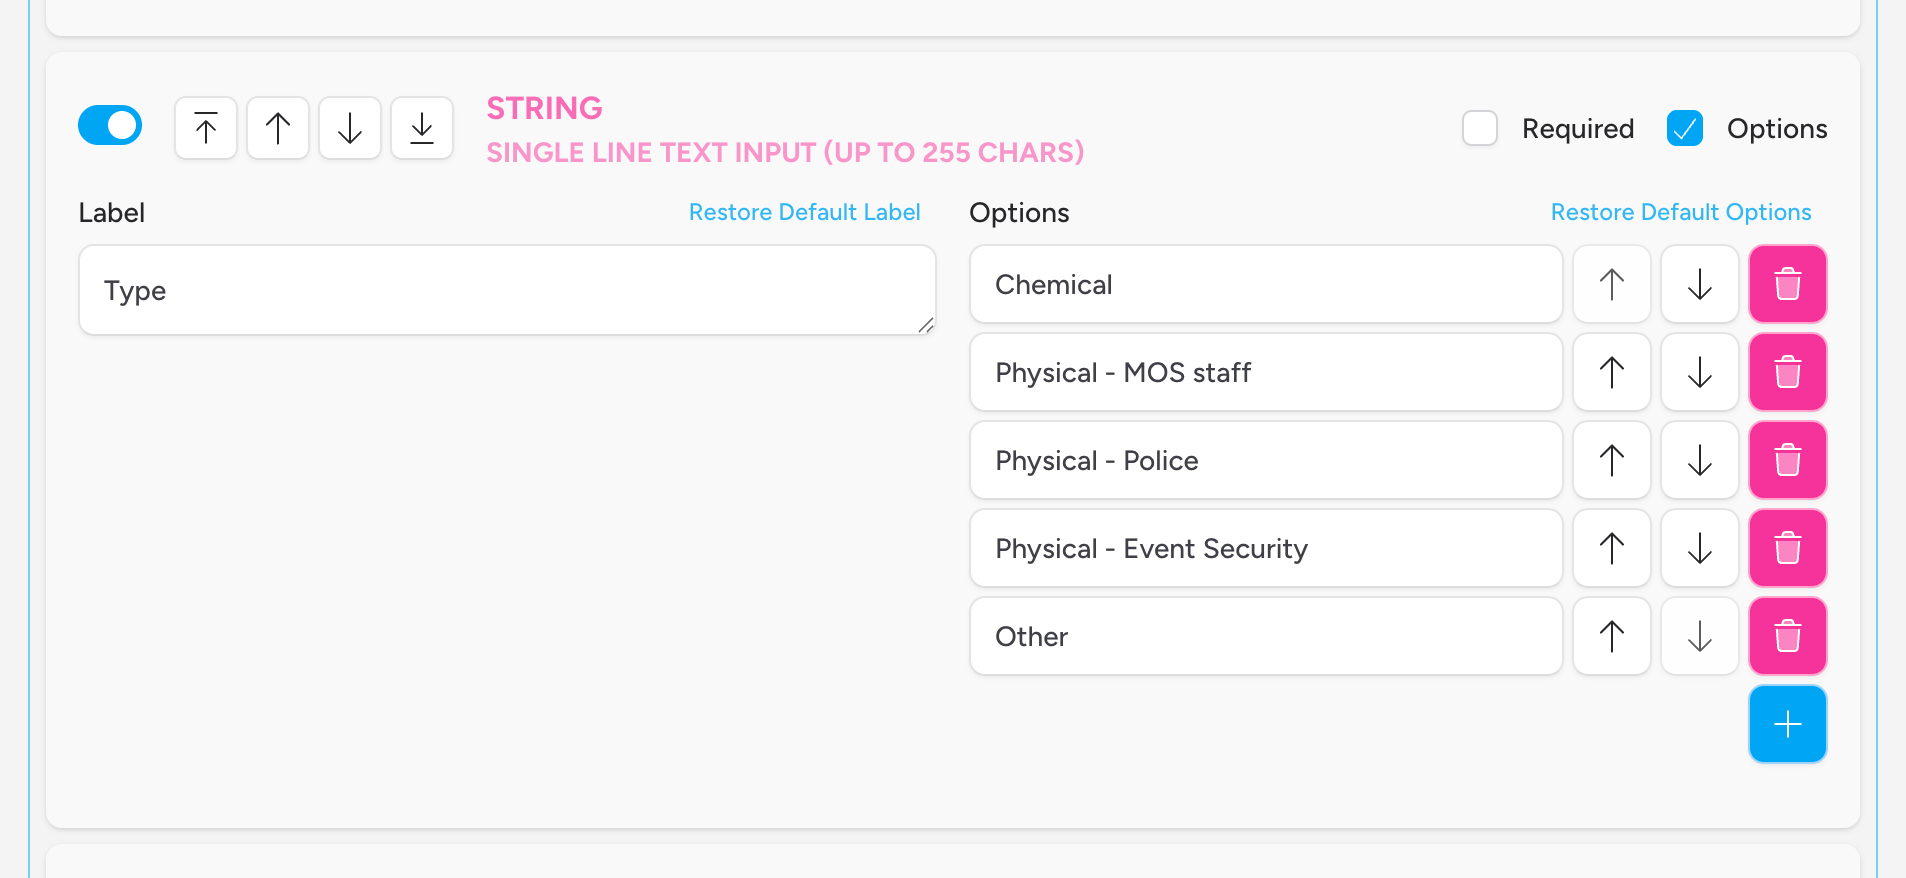
String fields — dropdown options
By default, a string field is a free-text input. Tick the Options checkbox on a string field to convert it into a dropdown selector instead. A list of option values will appear on the right-hand side.
- Click the + button to add an option.
- Type the option value in the input.
- Use the up/down arrows to reorder options.
- Click the bin icon to delete an option (you must have at least one option in the list).
Click Restore Default Options to reset the options list back to its original default state.
Integer fields — min and max
Set a Min and Max value to constrain the number range your crew can enter. If left blank, the input defaults to a minimum of 0 and a maximum of 350.
Datetime fields — date, time, or both
Tick the Date checkbox, the Time checkbox, or both, to control what the input collects. For example, a field that captures only a time (no date) is useful for recording clinical event times, while capturing both is suitable for logging when a patient arrived at an event.
Restoring panel defaults
If you've made a mess of the configuration and want to start fresh, click Restore Panel Defaults in the top-right of the editor. This resets the panel to its original state — all fields hidden, all labels back to their defaults. This action saves immediately.
Attaching Custom Panels to a Record Template
Creating a custom panel doesn't automatically make it appear on patient records. You need to attach it to one or more of your team's record templates.
- Navigate to Template Config in the Configuration section of the sidebar.
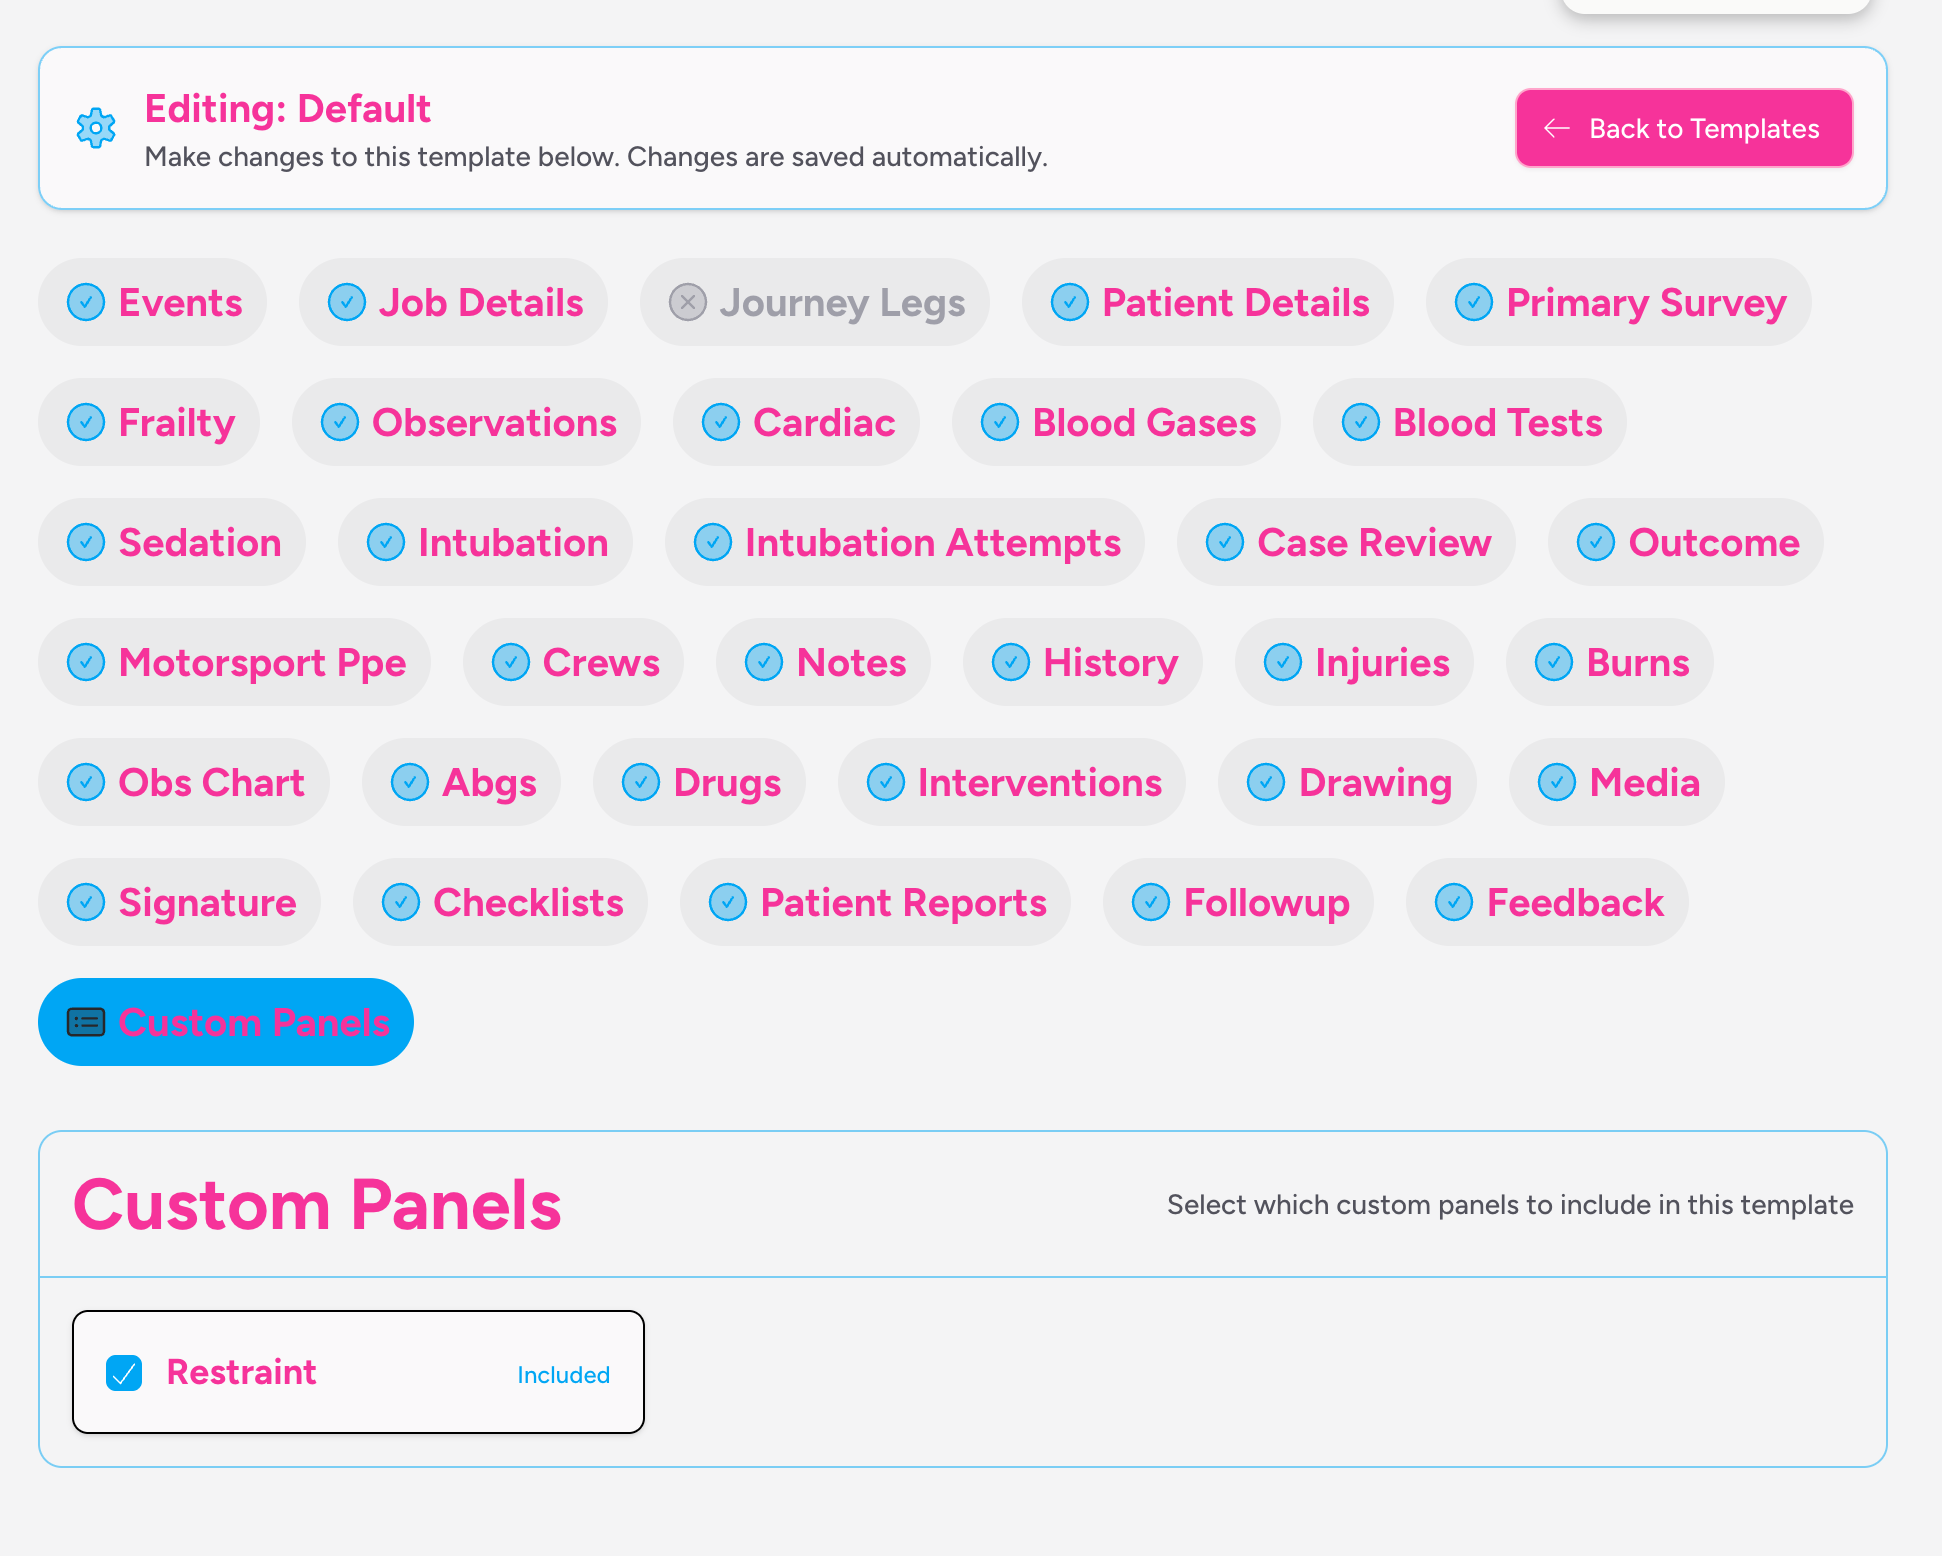
- Open the template you want to add the panel to by clicking Edit.
- Select the Custom Panels tab inside the template editor.
- Tick the checkbox next to any custom panel you want to include in that template.
Changes save automatically. The panel will now appear on patient records created under jobs that use that template.
A custom panel can be included in more than one template simultaneously.
How Custom Panels Appear on Patient Records
When your crew opens a patient record on a job that uses a template with custom panels attached, those panels appear as separate sections in the record — positioned at the top or bottom of the record depending on how you configured each panel.
Each custom panel section initially shows a Create [Panel Name] button rather than any fields. Clicking that button activates the panel for that patient record, and the fields appear ready to complete.
![Screenshot: A custom panel section on a patient record showing the "Create [Panel Name]" button in the centre of an otherwise empty card](/docs/images/team-settings/custom-panels/create-panel-button.png)
Once created, the fields are displayed according to their type:
- String fields appear as text inputs or dropdowns, depending on whether you configured options.
- Integer fields appear as number inputs with increment and decrement controls.
- Text fields span the full width of the panel and expand as content is typed.
- Boolean fields appear as labelled checkboxes.
- Datetime fields show a date picker, time picker, or combined date-and-time picker.
To remove the custom panel data from a patient record, click the bin icon in the top-right corner of the panel card. You'll be asked to confirm before the data is deleted.
Custom Panels on Patient Reports
Custom panel data is included in both the on-screen patient report and the PDF patient report. Each custom panel appears as its own section, using the panel's title as the heading and the field labels as column headings. Only fields that contain data and are not hidden are shown.
Datetime fields are formatted according to whether you configured them to show a date, time, or both:
- Date only: shown as
DD/MM/YYYY - Time only: shown as
HH:MM - Date and time: shown as
DD/MM/YYYY HH:MM
Archiving and Restoring Panels
Archiving a panel
To remove a panel from use, click Archive on its card. You'll be asked to confirm.
Archived panels:
- No longer count towards your plan's panel allowance.
- Are removed from the record editor — they won't appear on new patient records.
- Are not deleted; their data remains intact on any records where it was already captured.
- Cannot be edited.
Archived panels appear in the Archived Panels section at the bottom of the Custom Panels page.
Restoring an archived panel
Click Restore on any archived panel to make it active again. The panel returns to your active list and can be edited and used in templates as before.
Restoring a panel counts against your plan's panel allowance. If you're already at your limit, the restore will be blocked until you archive another panel.
Limitations
- The total number of custom panels you can have active at one time is set by your plan.
- Each panel has a fixed maximum number of field slots per type: 6 string fields, 6 integer fields, 3 text fields, 3 boolean fields, and 3 datetime fields. You cannot add more fields beyond these limits.
- String fields support a maximum of 255 characters.
- Custom panels are team-scoped — they are only available within your team and cannot be shared between teams.
- Archived panels cannot be edited. Restore a panel first if you need to make changes.
Troubleshooting
The Create Panel button is disabled or I see a message about reaching my limit. You've reached the maximum number of active custom panels for your plan. Archive a panel you're no longer using, or contact support to discuss upgrading your plan.
I created a panel but it's not appearing on patient records. Custom panels must be attached to a record template before they show up on patient records. Go to Template Config in the Configuration section, edit the relevant template, open the Custom Panels tab, and tick the panel. See Template Config.
I get an error saying a panel with that name already exists. Check both your active and archived panels — the name must be unique across both. If there's an archived panel with the same name, either restore and rename it, or choose a different name for the new one.
A required field is blocking record submission. If a crew member sees a validation error on a custom panel field, the field has been marked as Required in the panel configuration but hasn't been filled in. The record can't be saved until all required fields across all active panels are completed.
I can't access Custom Panels in the sidebar. Custom Panels requires both administrator access and an active subscription. If you're a team member (not an administrator), you won't be able to access this page. If you're an administrator but the page is inaccessible, check whether your team's subscription is active.
Related: Template Config | Patient Records